(→Dream Eaters: Title change.) |
(Treasure List Completed...) |
||
| Line 122: | Line 122: | ||
File:Monstro.png|<br><br><br>'''[[Monstro (Boss)|Monstro]]''' |
File:Monstro.png|<br><br><br>'''[[Monstro (Boss)|Monstro]]''' |
||
</gallery> |
</gallery> |
||
| + | |||
| + | ==Treasure List== |
||
| + | ===''Kingdom Hearts 3D: Dream Drop Distance''=== |
||
| + | |||
| + | <div class="tabber" style="float: left;"> |
||
| + | <div class="tabbertab" title="Prankster's Paradise" style="float:center;background-color:white"> |
||
| + | <div class="tabber" style="float: left;"> |
||
| + | <div class="tabbertab" title="Sora" style="float:center;background-color:#fff"> |
||
| + | {|cellspacing="0" cellpadding="5" border="1" align="center" |
||
| + | !style="background:#C71585;" align="center"|No. |
||
| + | !width="200" style="background:#C71585;" align="center"|Reward |
||
| + | !width="200" style="background:#C71585;" align="center"|Location |
||
| + | |-style="background:#dab0d6;" align="center" |
||
| + | |1 |
||
| + | |Blizzara |
||
| + | |Amusement Park – Southwest Tower, Top |
||
| + | |-style="background:#dab0d6;" align="center" |
||
| + | |2 |
||
| + | |Drop-Me-Not |
||
| + | |Amusement Park – Northeast Tower, Bottom |
||
| + | |-style="background:#dab0d6;" align="center" |
||
| + | |3 |
||
| + | |Balloon |
||
| + | |Amusement Park - Southwest Tower, Bottom |
||
| + | |-style="background:#dab0d6;" align="center" |
||
| + | |4 |
||
| + | |Shield Cookie 2 |
||
| + | |Amusement Park – Northwest Tower, Bottom |
||
| + | |-style="background:#dab0d6;" align="center" |
||
| + | |5 |
||
| + | |Malleable Fantasy |
||
| + | |Amusement Park – Ferris Wheel |
||
| + | |-style="background:#dab0d6;" align="center" |
||
| + | |6 |
||
| + | |Paint Gun: Yellow |
||
| + | | Amusement Park – Ferris Wheel, Bottom |
||
| + | |-style="background:#dab0d6;" align="center" |
||
| + | |7 |
||
| + | |Ice Dream Cone 2 |
||
| + | | Amusement Park – East, Tree |
||
| + | |-style="background:#dab0d6;" align="center" |
||
| + | |8 |
||
| + | |Block-it Chocolate 2 |
||
| + | | Amusement Park - Center |
||
| + | |- style="background:#dab0d6;" align="center" |
||
| + | |9 |
||
| + | |Hi-Potion |
||
| + | | Amusement Park - Southeast |
||
| + | |- style="background:#dab0d6;" align="center" |
||
| + | |10 |
||
| + | |Treasure Goggles |
||
| + | | Amusement Park – Ferris Wheel |
||
| + | |- style="background:#dab0d6;" align="center" |
||
| + | |11 |
||
| + | |Hi-Potion |
||
| + | |Promontory - Southeast |
||
| + | |- style="background:#dab0d6;" align="center" |
||
| + | |12 |
||
| + | |Water Barrel |
||
| + | | Promontory – East, Upper Area |
||
| + | |- style="background:#dab0d6;" align="center" |
||
| + | |13 |
||
| + | |Ice Dream Cone 2 |
||
| + | | Promontory - North |
||
| + | |- style="background:#dab0d6;" align="center" |
||
| + | |14 |
||
| + | |Block-it Chocolate 2 |
||
| + | | Windup Way - South |
||
| + | |- style="background:#dab0d6;" align="center" |
||
| + | |15 |
||
| + | |Drop-Me-Not |
||
| + | |Windup Way - Center |
||
| + | |- style="background:#dab0d6;" align="center" |
||
| + | |16 |
||
| + | |Aerial Slam |
||
| + | |Windup Way – Center, Upper Area |
||
| + | |- style="background:#dab0d6;" align="center" |
||
| + | |17 |
||
| + | |Royal Cake |
||
| + | |Windup Way – Center, Upper Area |
||
| + | |- style="background:#dab0d6;" align="center" |
||
| + | |18 |
||
| + | |Hi-Potion |
||
| + | |Windup Way - North |
||
| + | |- style="background:#dab0d6;" align="center" |
||
| + | |19 |
||
| + | |Balloon |
||
| + | |Circus - Northeast |
||
| + | |- style="background:#dab0d6;" align="center" |
||
| + | |20 |
||
| + | |Drop-Me-Not |
||
| + | |Circus - North |
||
| + | |- style="background:#dab0d6;" align="center" |
||
| + | |21 |
||
| + | |Confetti Candy 2 |
||
| + | |Circus - South |
||
| + | |- style="background:#dab0d6;" align="center" |
||
| + | |22 |
||
| + | |Rampant Fancy |
||
| + | |Circus – East, Green Trampoline |
||
| + | |- style="background:#dab0d6;" align="center" |
||
| + | |23 |
||
| + | |Panacea |
||
| + | |Ocean Way - North |
||
| + | |- style="background:#dab0d6;" align="center" |
||
| + | |24 |
||
| + | |Lofty Fantasy |
||
| + | |Ocean Way – Center, Upper Area |
||
| + | |- style="background:#dab0d6;" align="center" |
||
| + | |25 |
||
| + | |Paint Gun: Sky Blue |
||
| + | |Ocean Way – Northeast, Platform |
||
| + | |- style="background:#dab0d6;" align="center" |
||
| + | |26 |
||
| + | |Zero Gravira |
||
| + | |Ocean Way – South, Upper Area |
||
| + | |- style="background:#dab0d6;" align="center" |
||
| + | |27 |
||
| + | |Rampant Fancy |
||
| + | |Ocean Depths - Northwest |
||
| + | |- style="background:#dab0d6;" align="center" |
||
| + | |28 |
||
| + | |Treasure Goggles |
||
| + | |Ocean Depths - Northwest |
||
| + | |- style="background:#dab0d6;" align="center" |
||
| + | |29 |
||
| + | |Royal Cake |
||
| + | |Ocean Depths – North, Center |
||
| + | |- style="background:#dab0d6;" align="center" |
||
| + | |30 |
||
| + | |Tatsu Steed Recipe |
||
| + | |Ocean Depths - South |
||
| + | |- style="background:#dab0d6;" align="center" |
||
| + | |31 |
||
| + | |Shield Cookie 2 |
||
| + | |Ocean Depths – West, Upper Area |
||
| + | |} |
||
| + | </div> |
||
| + | <div class="tabbertab" title="Riku" style="float: center; background-color:white"; width="450px"> |
||
| + | {|cellspacing="0" cellpadding="5" border="1" align="center" |
||
| + | !style="background:#C71585;" align="center"|No. |
||
| + | !width="200" style="background:#C71585;" align="center"|Reward |
||
| + | !width="200" style="background:#C71585;" align="center"|Location |
||
| + | |-style="background:#dab0d6;" align="center" |
||
| + | |1 |
||
| + | |Ice Dream Cone 2 |
||
| + | |Monstro: Mouth - Southwest |
||
| + | |-style="background:#dab0d6;" align="center" |
||
| + | |2 |
||
| + | |Paint Gun: Blue |
||
| + | | Monstro: Mouth - Southeast |
||
| + | |-style="background:#dab0d6;" align="center" |
||
| + | |3 |
||
| + | |Balloon |
||
| + | | Monstro: Mouth - Northeast |
||
| + | |-style="background:#dab0d6;" align="center" |
||
| + | |4 |
||
| + | |Panacea |
||
| + | | Monstro: Mouth - Northwest |
||
| + | |-style="background:#dab0d6;" align="center" |
||
| + | |5 |
||
| + | |Hi-Potion |
||
| + | | Monstro: Mouth - Southwest |
||
| + | |-style="background:#dab0d6;" align="center" |
||
| + | |6 |
||
| + | |Shield Cookie 2 |
||
| + | |Monstro: Throat – West |
||
| + | |-style="background:#dab0d6;" align="center" |
||
| + | |7 |
||
| + | |Sir Kyroo Recipe |
||
| + | | Monstro: Throat – North, Upper Area |
||
| + | |-style="background:#dab0d6;" align="center" |
||
| + | |8 |
||
| + | |Charming Fantasy |
||
| + | | Monstro: Throat - South, Upper Area |
||
| + | |-style="background:#dab0d6;" align="center" |
||
| + | |9 |
||
| + | |Mini |
||
| + | | Monstro: Throat - East, Upper Area |
||
| + | |-style="background:#dab0d6;" align="center" |
||
| + | |10 |
||
| + | |Hi-Potion |
||
| + | | Monstro: Throat - Center |
||
| + | |-style="background:#dab0d6;" align="center" |
||
| + | |11 |
||
| + | |Shield Cookie 2 |
||
| + | | Monstro: Throat – Northeast |
||
| + | |-style="background:#dab0d6;" align="center" |
||
| + | |12 |
||
| + | |Treasure Goggles |
||
| + | | Monstro: Throat – North, Lower Area |
||
| + | |-style="background:#dab0d6;" align="center" |
||
| + | |13 |
||
| + | |Drop-Me-Not |
||
| + | |Monstro: Stomach - West |
||
| + | |-style="background:#dab0d6;" align="center" |
||
| + | |14 |
||
| + | |Confetti Candy 2 |
||
| + | | Monstro: Stomach (Upside Down) – North |
||
| + | |-style="background:#dab0d6;" align="center" |
||
| + | |15 |
||
| + | |Block-it Chocolate 2 |
||
| + | | Monstro: Stomach - Center |
||
| + | |-style="background:#dab0d6;" align="center" |
||
| + | |16 |
||
| + | |Hi-Potion |
||
| + | | Monstro: Stomach - Southeast |
||
| + | |-style="background:#dab0d6;" align="center" |
||
| + | |17 |
||
| + | |Collision Magnet |
||
| + | | Monstro: Stomach (Upside Down) - North, Upper Area |
||
| + | |-style="background:#dab0d6;" align="center" |
||
| + | |18 |
||
| + | |Confetti Candy 2 |
||
| + | | Monstro: Gut - Southeast |
||
| + | |-style="background:#dab0d6;" align="center" |
||
| + | |19 |
||
| + | |Royal Cake |
||
| + | |Monstro: Gut (Upside Down)- Center |
||
| + | |-style="background:#dab0d6;" align="center" |
||
| + | |20 |
||
| + | |Water Barrel |
||
| + | | Monstro: Gut - North |
||
| + | |-style="background:#dab0d6;" align="center" |
||
| + | |21 |
||
| + | |Drop-Me-Not |
||
| + | | Monstro: Gut - North |
||
| + | |-style="background:#dab0d6;" align="center" |
||
| + | |22 |
||
| + | |Panacea |
||
| + | | Monstro: Gut – West, Platform |
||
| + | |} |
||
| + | </div></div></div> |
||
| + | </div> |
||
| + | |||
| + | {{-}} |
||
==Gallery== |
==Gallery== |
||
Revision as of 20:30, 28 October 2014
Template:Images
Template:Game Template:World Prankster's Paradise is a world in Kingdom Hearts 3D: Dream Drop Distance. It is based on the 1940 Disney film Pinocchio, although an area based off the sea from the film appears as a Mirage Arena match in Kingdom Hearts Birth by Sleep Final Mix. Originally the world was set to appear in Kingdom Hearts 358/2 Days, but was eventually removed due to space restrictions.
Development
Originally the world was set to appear in Kingdom Hearts 358/2 Days, but was eventually removed due to space restrictions.
Tetsuya Nomura explained that the planned plot for the world was set in a circus and was to be played off the story of Pinocchio, a puppet with a heart, and the Nobodies who possess no hearts themselves, then planned for a sad episode with Roxas and Xion looking for hope for themselves. The world would have included Pinocchio as a human, and Gepetto, as well as the villains Honest John and Gideon from the original film. The profile sprites for the characters still appear within the final game's data.
Setting
The setting for Prankster's Paradise in Dream Drop Distance takes place in three main locations. Sora's story takes place in Pleasure Island, which contains areas such as the Amusement Park and Windup Way and later on, the story moves to the Ocean Floor. Riku's Story takes place wholly inside Monstro the Whale, with the main areas being the Mouth, Belly and Cavity.
In Kingdom Hearts: Birth by Sleep Final Mix, the battle against Monstro takes place in an area known as the Star Ocean.
Story
Kingdom Hearts Birth by Sleep Final Mix
Terra, Aqua and Ventus battle Monstro in a digital representation of Prankster's Paradise in the Monster of the Deep battle of the Mirage Arena.
Between Kingdom Hearts: Birth by Sleep and Kingdom Hearts
Prior to the events of Kingdom Hearts, Prankster's Paradise was destroyed by the Heartless. During the chaos of the destruction of their world, Geppetto, Pinocchio, and Jiminy Cricket were separated, each landing in a different world; Gepetto was swallowed by Monstro (who managed to survive the destruction of their world but ended up wandering the gummi routes between Agrabah, Atlantica and Halloween Town), Pinocchio washed up in Traverse Town, and Jiminy Cricket wound up at Disney Castle. When Sora and King Mickey sealed the door to Kingdom Hearts, the world was restored, with both Pinocchio and Gepetto returning to the world. Jiminy Cricket however, did not return to the world immediately, for reasons unknown, but remained at Disney Castle instead, eventually setting off to travel with Donald and Goofy.
Though it was restored, Prankster's Paradise remained in a deep sleep instead of returning to the Realm of Light, and continued to be plagued by Nightmare Dream Eaters.
Kingdom Hearts 3D: Dream Drop Distance
- Sora's Side
Sora arrives in an amusement park, and lets out an exclamation in amazement at the sight he beholds in front of him. Looking around, he hears a voice talking to itself, only to realise that it is in fact Jiminy contemplating on what to do about Pinocchio. Sora greets Jiminy as he usually would, only to receive the response that he 'shouldn't be there'. Sora persists, asking Jiminy if he is 'OK'. The cricket responds, saying that he is surprised that Sora would have heard of him. Remembering Yen Sid mentioning that the worlds are asleep and that they are, in actuality, trapped in a dream, Sora puts aside the fact they've met and listens to Jiminy's tale. Pinocchio is missing. Jiminy recalls talking to Pinocchio about what had happened to him before he was trapped in a cage. There, Pinocchio tells lies about what he had actually been doing, causing his nose to grow, as it does whenever he does not tell the absolute truth. Eventually though, Pinocchio recounts the true story to Jiminy, telling him that a stranger in a black coat had instructed the puppet to play a trick on a 'Sora'. The blue fairy arrives, and gives Pinocchio instruction on why not to tell lies, before restoring his nose to its former condition. Jiminy's tale completed, Sora groans at the mention of the person in the black coat. However, that is not the real problem; if boys misbehave for too long in Prankster's Paradise, they turn into "jackamules". Learning this, Sora decides to look for Pinocchio before Pleasure Island's magic turned the poor puppet into a donkey.
However, their process is hindered by several Jestabocky Dream Eaters disgused as Pinocchio. Finding a partially transformed Pinocchio in the top tent, Sora holds Dream Eaters at bay to prevent them from harming his friends while they make their escape. Finishing his battle, Sora begins to start after Jiminy and Pinocchio, only to be stopped in his tracks by the appearance of Young Xehanort and Xemnas. Xemnas comments on the absurdity of a puppet like Pinnochio having a heart, before Sora points out that the puppet isn't at all like Nobodies, but then comments that if Pinocchio could grow a heart, it should be that a nobody could do likewise. Xemnas acknowledges this, but comments that Sora himself is not so very different from a Nobody, before leaving through a Dark Corridor.
Perplexed by his foe's parting words, Sora leaves the tent, only to be met by the Blue Fairy, who informs him that Pinocchio and Jiminy went in search of Geppetto, who was swallowed by Monstro the whale. The Blue Fairy then continues to say that when she told Pinocchio and Jiminy of Geppetto's fate, they ran off to attempt a rescue mission. The scene changes to Jiminy telling Pinocchio what he knows of Monstro, before attempting to convince the puppet to change his mind about the mission. When Pinocchio refuses to submit, Jiminy offers to accompany the puppet. Sora follows the duo into the ocean, where they are eaten by Monstro. When Sora begins to chase the whale, a large Dream Eater swims past him, and traps Monstro in ice. In a desperate attempt to save his friends, Sora battles Chill Clawbster.
Having defeated the Dream Eater, Sora frees Monstro from captivity, and is sent flying by Monstro's sneeze after the whale eats the defeated Dream Eater. Sora wakes up to find himself on a beach, before getting up and running back towards the ocean. Before submerging himself once again, he states aloud the course of events that would occur next. He recalls that the world eventually gets dragged into darkness, and Monstro and those that the whale has eaten are cast into the lanes between worlds. Following this, the entire group, with the exception of Jiminy Cricket, end up in Traverse Town. Sora then spots a Keyhole and seals it, releasing Prankster's Paradise from its slumber.
- Riku's Side
Riku arrives in the world inside Monstro's mouth, and immediately hears a voice calling for Pinocchio. Riku recognises the figure shouting for the puppet as Geppetto, and makes his way across from the inside next to Monstro's teeth to the back of his mouth. Upon reaching the old man, Riku introduces himself, although Geppetto seems slightly unnerved by the sudden appearance of the boy. Geppetto then goes on to console Riku for his also being swallowed up by the large whale, before taking his turn to introduce himself, and also explains that he is looking for Pinocchio, who ran off 'again' after Geppetto found him inside Monstro. Riku looks worried, but doesn't waste time thinking about the problem at hand. Instead, he agrees to look for Pinocchio himself. Geppetto expresses his gratitude to the boy, before walking away, leaving Riku to talk to Jiminy, who explains to Riku that he saw Pinocchio walking off with a 'man in a black coat'. Riku appears disgusted by the news of the man's reappearance, and begins to walk off in search of the puppet, only to be surprised by Jiminy, who jumps onto his shoulder, informing him that Pinocchio will need his conscience. After searching the insides of the whale for some time, the duo notice a hooded figure walking alongside Pinnochio down below them. Jiminy exclaims in surprise, causing both the figure and Pinocchio to turn around, with Pinocchio shouting Jiminy's name eagerly. Riku demands that the figure release Jiminy, and also questions the identity of the stranger. Riku is shocked to see that the cloaked figure is in fact a double of himself and contemplates on how he gave into the Darkness once, and that it has followed him around in many forms, ranging from Ansem, Seeker of Darkness to the replica created by Vexen. Pinocchio questions whether Riku has a 'Jiminy' like he does. Here, he is referring to the cricket as his conscience. The puppet further explains that perhaps Riku just needs someone to show him what is right, and what is wrong. Riku smiles at the thought of Sora being the best teacher he could ever have.
Before any further conversation can be had, a tremor coming from further inside Monstro causes Riku to leave Pinocchio and Jiminy behind. Running into the area where the noise had come from, Riku comes across a large Dream Eater, which attempts to hurt Riku. Upon missing, Char Clawbster jumps from the roof of the area, and prepares to face Riku. Defeating it, Riku travels back to Monstro's mouth, where he watches Pinocchio's reunion with Geppetto. Contemplating on the world's state of stability, Riku realizes that Prankster's Paradise cannot move forward in time until it awakens from Darkness, unlocking the world's Keyhole.
Characters
| File:KH3D icon.png | Name | Journal Entry |
|---|---|---|
| ||
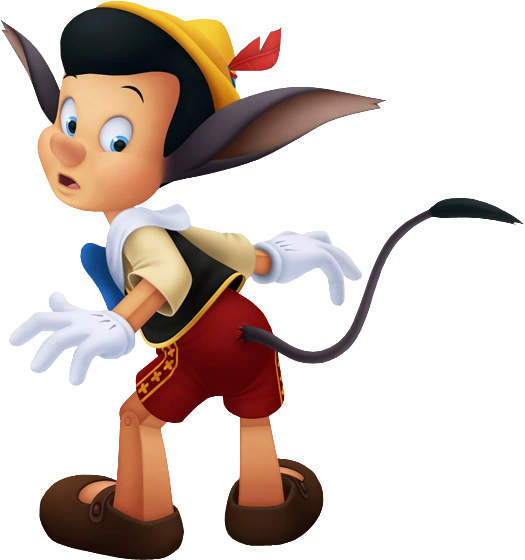
| Pinocchio (ピノキオ Pinokio?) |
A wooden puppet Geppetto made. The Blue Fairy breathed life into him and appointed Jiminy his conscience. Pinocchio's nose grows every time he lies. But he is trying to be good so he can become a real boy. | |
| File:Jiminy Cricket KH3D.png | ||
| Jiminy Cricket (ジミニー・クリケット Jiminī Kuriketto?) |
A faithful friend whom the Blue Fairy has appointed Pinocchio's conscience. | |
| File:Geppetto.png | ||
| Geppetto (ゼペット Zepetto?) |
Pinocchio's father. He went out to sea to find his son but was swallowed, boat and all, by Monstro the whale. Inside Monstro he was reunited with Pinocchio, and they all made it out safely. | |
| File:Blue Fairy.png | ||
| Blue Fairy (ブルーフェアリ Burū Fearī?) |
The fairy who gave life to Pinocchio and apointed Jiminy his conscience. | |
| File:Monstro.png | ||
| Monstro (モンストロ Monsutoro?) |
A giant whale who lives at the bottom of the sea. His mouth is so huge he can swallow up anything. |
Enemies
Nightmares
.png "Kooma Panda (Nightmare).png (100 KB)")
.png "Hebby Repp (Nightmare).png (165 KB)")
.png "Lord Kyroo (Nightmare).png (144 KB)")
.png "Sir Kyroo (Nightmare).png (196 KB)")
.png "Jestabocky (Nightmare).png (141 KB)")
.png "Juggle Pup (Nightmare).png (436 KB)")
.png "Tatsu Steed (Nightmare).png (246 KB)")
Somebodies
Monstro
Treasure List
Kingdom Hearts 3D: Dream Drop Distance
| No. | Reward | Location |
|---|---|---|
| 1 | Blizzara | Amusement Park – Southwest Tower, Top |
| 2 | Drop-Me-Not | Amusement Park – Northeast Tower, Bottom |
| 3 | Balloon | Amusement Park - Southwest Tower, Bottom |
| 4 | Shield Cookie 2 | Amusement Park – Northwest Tower, Bottom |
| 5 | Malleable Fantasy | Amusement Park – Ferris Wheel |
| 6 | Paint Gun: Yellow | Amusement Park – Ferris Wheel, Bottom |
| 7 | Ice Dream Cone 2 | Amusement Park – East, Tree |
| 8 | Block-it Chocolate 2 | Amusement Park - Center |
| 9 | Hi-Potion | Amusement Park - Southeast |
| 10 | Treasure Goggles | Amusement Park – Ferris Wheel |
| 11 | Hi-Potion | Promontory - Southeast |
| 12 | Water Barrel | Promontory – East, Upper Area |
| 13 | Ice Dream Cone 2 | Promontory - North |
| 14 | Block-it Chocolate 2 | Windup Way - South |
| 15 | Drop-Me-Not | Windup Way - Center |
| 16 | Aerial Slam | Windup Way – Center, Upper Area |
| 17 | Royal Cake | Windup Way – Center, Upper Area |
| 18 | Hi-Potion | Windup Way - North |
| 19 | Balloon | Circus - Northeast |
| 20 | Drop-Me-Not | Circus - North |
| 21 | Confetti Candy 2 | Circus - South |
| 22 | Rampant Fancy | Circus – East, Green Trampoline |
| 23 | Panacea | Ocean Way - North |
| 24 | Lofty Fantasy | Ocean Way – Center, Upper Area |
| 25 | Paint Gun: Sky Blue | Ocean Way – Northeast, Platform |
| 26 | Zero Gravira | Ocean Way – South, Upper Area |
| 27 | Rampant Fancy | Ocean Depths - Northwest |
| 28 | Treasure Goggles | Ocean Depths - Northwest |
| 29 | Royal Cake | Ocean Depths – North, Center |
| 30 | Tatsu Steed Recipe | Ocean Depths - South |
| 31 | Shield Cookie 2 | Ocean Depths – West, Upper Area |
| No. | Reward | Location |
|---|---|---|
| 1 | Ice Dream Cone 2 | Monstro: Mouth - Southwest |
| 2 | Paint Gun: Blue | Monstro: Mouth - Southeast |
| 3 | Balloon | Monstro: Mouth - Northeast |
| 4 | Panacea | Monstro: Mouth - Northwest |
| 5 | Hi-Potion | Monstro: Mouth - Southwest |
| 6 | Shield Cookie 2 | Monstro: Throat – West |
| 7 | Sir Kyroo Recipe | Monstro: Throat – North, Upper Area |
| 8 | Charming Fantasy | Monstro: Throat - South, Upper Area |
| 9 | Mini | Monstro: Throat - East, Upper Area |
| 10 | Hi-Potion | Monstro: Throat - Center |
| 11 | Shield Cookie 2 | Monstro: Throat – Northeast |
| 12 | Treasure Goggles | Monstro: Throat – North, Lower Area |
| 13 | Drop-Me-Not | Monstro: Stomach - West |
| 14 | Confetti Candy 2 | Monstro: Stomach (Upside Down) – North |
| 15 | Block-it Chocolate 2 | Monstro: Stomach - Center |
| 16 | Hi-Potion | Monstro: Stomach - Southeast |
| 17 | Collision Magnet | Monstro: Stomach (Upside Down) - North, Upper Area |
| 18 | Confetti Candy 2 | Monstro: Gut - Southeast |
| 19 | Royal Cake | Monstro: Gut (Upside Down)- Center |
| 20 | Water Barrel | Monstro: Gut - North |
| 21 | Drop-Me-Not | Monstro: Gut - North |
| 22 | Panacea | Monstro: Gut – West, Platform |
Gallery
")
")
Template:WorldDirectory